Hey everyone, let’s cut to the chase—if you’re here, chances are you’re either designing a new industrial system, replacing a wonky distribution chamber that’s been giving your team headaches, or just trying to wrap your head around what makes these things actually work (and not end up costing you a fortune down the line). As someone who’s been supplying distribution chambers for 12 years, I’ve seen it all: folks who overspent on fancy specs they never needed, others who skipped a critical detail and had their whole production line down for 3 days, and even a few who thought a cheap off-the-shelf unit would work… yeah, that one ended in a flood (don’t ask). Today, I’m gonna walk you through how to actually design a distribution chamber that fits your needs, works for years, and doesn’t make you regret every decision. No stuffy engineering jargon—just real talk from someone who’s built hundreds of these bad boys. Distribution Chamber
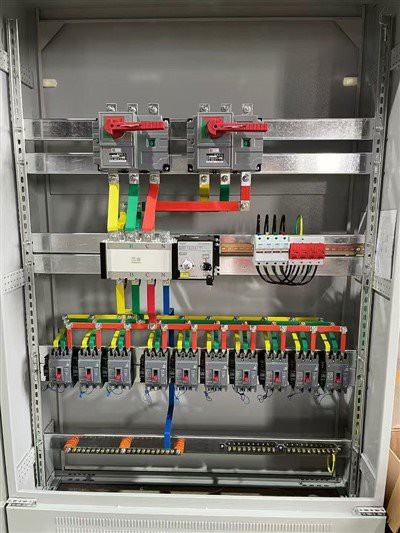
First off, let’s make sure we’re on the same page: what even is a distribution chamber? If you’re new here, it’s basically a hub that moves fluid (could be water, oil, chemicals, whatever your line uses) from one main supply line to multiple branch lines. Think of it like a traffic roundabout for liquids—instead of a single pipe dumping everything, you split it evenly so every part of your operation gets the exact flow it needs, no backups, no dry pipes, no weird pressure drops that make your equipment act up. Got it? Good. Now, let’s get into the actual design steps.
Step 1: Start with your non-negotiables—don’t skip this part. I see so many folks jump straight to picking a chamber shape or material without writing down their absolute must-haves, and it’s a disaster. Let’s break this down into three simple questions: What fluid are you moving? What’s your flow rate and pressure? What’s your space like?
Fluid type is huge. If you’re moving regular tap water for a food processing plant, you can go with a standard PVC or mild steel chamber—easy to install, cheap, and no issues. But if you’re moving corrosive chemicals for a manufacturing plant? Mild steel will rust in 6 months, PVC will warp. I’ve had clients with hydrofluoric acid lines come to me panicking because their cheap chamber started leaking within a week—we swapped it for a HDPE-lined stainless steel unit, and they’ve had zero issues in 5 years. Don’t cut corners here. Also, check if your fluid has any weird properties—like if it’s viscous (think oil instead of water) or has solid particles mixed in (like sludge from a wastewater plant). That changes everything, too—you’ll need extra-large inlets/outlets or a way to clean sediment out, which we’ll talk about later.
Next, flow rate and pressure. This is where a lot of rookie designers mess up. If your main supply line pumps 500 gallons per minute (GPM) at 100 psi, your chamber can’t handle 300 GPM max and 80 psi—simple as that. But here’s the thing: you don’t just match the main line specs. You also need to account for each branch line. Let’s say you have 5 branch lines, each needing 80 GPM. That adds up to 400 GPM total, so your chamber needs to handle at least that, plus a 10-15% buffer (trust me, that buffer is for when you add a new line later or your flow spikes during peak hours). If you size it exactly, you’ll get pressure drops that make some branches get way more flow than others, and that’s a headache for your operators. I always tell clients: never design to the minimum, design to the load you actually use plus a little extra room to grow.
Space is the third non-negotiable. Your chamber doesn’t exist in a vacuum—you’ve got pipes running around it, equipment next to it, maybe you need access for maintenance. I’ve had clients come to me with a 2ft x 2ft space that they thought would fit their 5-outlet chamber, only to realize they couldn’t get a wrench in to tighten the bolts. Measure twice, and leave 6 inches of clearance on all sides for valves, filters, and future repairs. Also, think about orientation: is this chamber going underground? Above ground? Inside a building? Underground units need corrosion-resistant coatings and a drainage system so water doesn’t pool around them. Above ground, you need to consider weather—if it’s in Florida, it needs to hold up to humidity and sun; if it’s in Minnesota, it needs to handle freeze-thaw cycles (that means no uninsulated PVC, by the way).
Step 2: Pick the right design layout—round vs. rectangular, split vs. manifold. Let’s get into the actual shape and internal structure here. The two main shapes are round and rectangular, and neither is “better” than the other—they’re just for different jobs. Round chambers are my go-to for most industrial applications. Why? They handle pressure way more evenly than rectangular ones—no weak corners that can crack under high psi. They also distribute flow more smoothly, so you don’t get eddies (those are the little swirls that trap sediment or cause uneven flow to branches). If you’re moving a fluid with particles, round is less likely to have spots where gunk builds up. The only downside? Round chambers take up a tiny bit more space if you have a lot of outlets, but that’s negligible for most setups.
Rectangular chambers are great if you have super tight, oddly shaped spaces. I’ve installed them in retrofits where there was only a nook 3ft wide, no way to fit a round unit. But they do have more dead spots where sediment can collect, so if you’re moving dirty fluid, you’ll need to add a drain plug at the bottom to flush that out. Just make sure the corners are rounded, not sharp—sharp corners create pressure drops and can make fluid act weird.
Now, internal layout: manifold-style vs. split-style. Manifold is the classic one—one main inlet, then a set of outlets arranged evenly around or along the chamber. This is best for when you need each branch line to get exactly the same flow (like if you’re distributing water to 10 identical machines on an assembly line). The key here is outlet size: make all outlets the same diameter unless you intentionally want different flow rates for specific branches. If you need one line to get more flow, you can size that outlet bigger, but for equal distribution, same size = equal flow. I always add a ball valve to each outlet too—makes it easy to shut off one line for maintenance without shutting down the whole system.
Split-style chambers are for when you have two separate fluid streams that need to be distributed from one chamber. Like, if you’re mixing two chemicals and then splitting them into 5 lines, split-style keeps them separate until they hit the distribution point. Just make sure the split is in the middle so each side gets an equal amount of both fluids—if you offset it, one side will get more of one chemical, and your product will be inconsistent.
Step 3: Don’t skip the critical add-ons that save you later. I learned this the hard way early on: the cheap chamber with no add-ons that looks great at first will cost you way more in repairs and downtime. Let’s talk about the non-negotiable add-ons, and the ones that are worth the cash.
First, pressure gauges and flow meters. If you can’t see what’s happening inside your chamber, you’re flying blind. A pressure gauge on the main inlet tells you if you’re getting the flow you need, and gauges on each outlet let you spot if a line is clogged or failing. I always recommend digital gauges—they’re way easier to read than old analog ones, and you can even hook them up to your building’s monitoring system if you want. Flow meters go hand in hand—especially if you need to track how much fluid is going to each line for billing or process control. For example, a water treatment plant needs to track flow to each filter, so flow meters are non-negotiable.
Second, access ports and cleanouts. Let’s be real: even if you’re moving clean fluid, gunk will build up eventually. If your chamber doesn’t have a cleanout, you have to take the whole thing apart to get the sediment out—no one wants to do that. Add a 4-inch (or bigger, if you’re moving dirty fluid) cleanout at the bottom, with a cap that’s easy to remove (no 10 bolts you have to unscrew with a wrench every time). Also, add access ports on the sides if you need to service valves or meters inside the chamber. If you’re using a round chamber, the access port should be on the top—way easier to reach.
Third, corrosion and temperature protection. Wait, I mentioned material earlier, but this is different. Even if you pick a stainless steel chamber, if you’re operating at 150°F, you might need a special coating or insulation to keep it from warping. For outdoor units in harsh climates, a UV-resistant coating keeps sun from breaking down plastic materials. For underground units, a double-layer corrosion coating prevents soil moisture from eating away at steel. I once had a client skip this for an underground mild steel chamber—3 years later, it corroded through and flooded their entire basement. They spent way more fixing that than they would have on a coated unit.
Fourth, overflow and backflow preventers. This is for if your chamber is in a closed system, like a wastewater line. If pressure spikes suddenly, you don’t want fluid backing up into the main supply line and causing a mess. A backflow preventer stops that—cheap insurance. An overflow port is for if your chamber is used in open systems (like a flood control setup) so excess fluid doesn’t spill over the top. Both are way cheaper than the cleanup after a flood.
Step 4: Test it before you install it—this is the final check that separates good designs from great ones. Okay, so you’ve got your specs, layout, add-ons. Now what? Don’t just build it and install it—test it in a shop first. We do this for all our custom chambers, and it’s saved our clients so much headache. Run fluid through it at max flow and pressure, check for leaks, make sure each outlet has the correct flow rate, check for any weird eddies or sediment buildup. If you notice one outlet is getting 20% less flow than the others, you can adjust the outlet size before you mount it in your plant. I’ve had clients who skipped testing and had to tear out a whole system 2 weeks after installation because flow was uneven—testing avoids that.
Now, let’s talk about common mistakes I see all the time, so you can avoid them. First, sizing for current flow only. Like I said earlier, leave a buffer. I had a bakery client a few years back who designed a chamber for their 3 current mixing lines, then added a 4th line a year later. They had to replace the whole chamber because there was no room. Lesson: add 15-20% extra capacity, easy peasy. Second, using the wrong material for the fluid. Don’t use PVC for chemicals, don’t use mild steel for saltwater. Simple rule: check the chemical compatibility chart for the material you’re using, it’s 5 minutes of work that saves thousands. Third, forgetting maintenance access. I can’t tell you how many times I’ve had to fish a wrench into a tiny space because someone mounted the chamber right next to a wall with no clearance. Leave that space. Fourth, ignoring pressure drops. Even if your chamber is sized right, bad internal layout (like sharp corners, uneven outlets) can cause pressure drops that ruin your whole system. Test it, like I said.
Wait, one last thing: custom vs. off-the-shelf. A lot of folks ask me if they can just buy a standard chamber instead of designing a custom one. The answer is: if your application is super standard, like a small residential water distribution unit, off-the-shelf works. But if you’re a mid-sized or industrial operation, custom is almost always better. Off-the-shelf units are one-size-fits-all, so they might not fit your space, handle your specific pressure/flow, or have the add-ons you need. I specialize in custom distribution chambers, but I always tell clients if an off-the-shelf unit will work, I’ll send you in the right direction—no hard sell, because I’d rather you have something that works than waste money on something that doesn’t.

Okay, let’s wrap this up. Designing a distribution chamber isn’t rocket science, but it’s also not just picking a box and slapping some pipes on it. Start with your non-negotiables (fluid, flow/pressure, space), pick the right shape and layout, add the critical stuff like cleanouts and pressure gauges, test it before installation, and avoid the dumb mistakes I named. That’s it. Now, if you’re in the market for a distribution chamber—whether you need a custom one tailored to your exact specs, or you just have questions about sizing or materials—hit us up. We’ve worked with small businesses and large industrial plants, so we can help you figure out exactly what you need without all the overpriced, unnecessary add-ons. Just reach out for a chat, no pressure.
Tertiary Distribution Box References
- Miller, J. (2020). Fluid Distribution System Design for Industrial Applications. Industrial Press.
- National Fluid Power Association. (2019). Design Guidelines for Hydraulic Distribution Chambers. NFPA Publications.
- Smith, L. (2021). Corrosion Resistance in Fluid Handling Equipment. Materials Today Press.
- Occupational Safety and Health Administration. (2022). Process Safety Guidelines for Fluid Distribution Systems. OSHA Publications.
- Brown, K. (2018). Retrofit Design for Industrial Distribution Chambers. Engineering Journal of Fluid Systems.
Anhui Nanxian Electric Co., Ltd.
With abundant experience, we are one of the most professional distribution chamber manufacturers and suppliers in China. We warmly welcome you to buy advanced distribution chamber for sale here and get quotation from our factory. All customized products are with high quality and low price.
Address: Factory Unit 03-2, Building 21, Feidong Yinfeng Industrial Park Co., Ltd., Northeast Corner of Manquan Road and Changle Road, Hefei Circular Economy Demonstration Park, Feidong County, Hefei City, Anhui Province.
E-mail: 541580567@qq.com
WebSite: https://www.nxelepower.com/
